Monday 22 October 2012

The Battle of Elst.
This scenario is taken from the site of Bob Mackenzie, who publishes allot of WW2 scenarios designed for play with Command Decision. The OOB's however translate to Blitzkrieg Commander with comparative ease as the 2 systems are designed for a similar level of play.


The background to this particular scenario, as taken from Bob's site, is as follows:

The Market Garden operation is reaching its climax. The British paratroops still have a toe-hold over the upper Rhine at Oosterbeek. XXX Corps is still pushing north and the Germans of Kampfgruppe Knaust at Elst are in the way. The 7th Somerset Light Infantry Battalion and the 1st Worcestershire Infantry Battalion of the 43rd Wessex Division have been tasked to remove the Germans from the town. The Germans have been reinforced by elements of the 10SS Panzer Division including a handful of new Panthers.

At the start of the day both British battalions were still some way from the intended battlefield. Deployment was delayed by the sodden ground, pockets of resistance and German shell fire. It’s raining. At 1600 hrs the attack commences.


An overview of the Battlefield from the British end, the Town of Elst seen towards the end of the table.


The British ready to attack. The Worcestershire Infantry Battalion in the Background and the Somerset Infantry Battalion in the foreground. Each Battalion is supported by a Squadron of the Dragoon Guards.


The German Defenders in Elst. The defenders have 3 Infantry companies with some support units. A SS Panther unit is also present alongside a company of SS infantry.  In reserve is an Panzer company consisting of a single Panzer III unit and a company of STUGs. The arrival of both are triggered  by the British reaching certain points along the road to Elst.


Turns 1-2


The first turn for the British brought mixed success. The Somersets and their Tank support made 2 successful moves towards their objective, whilst the Worcesters could only manage one, the CO attempted to get them moving but failed.


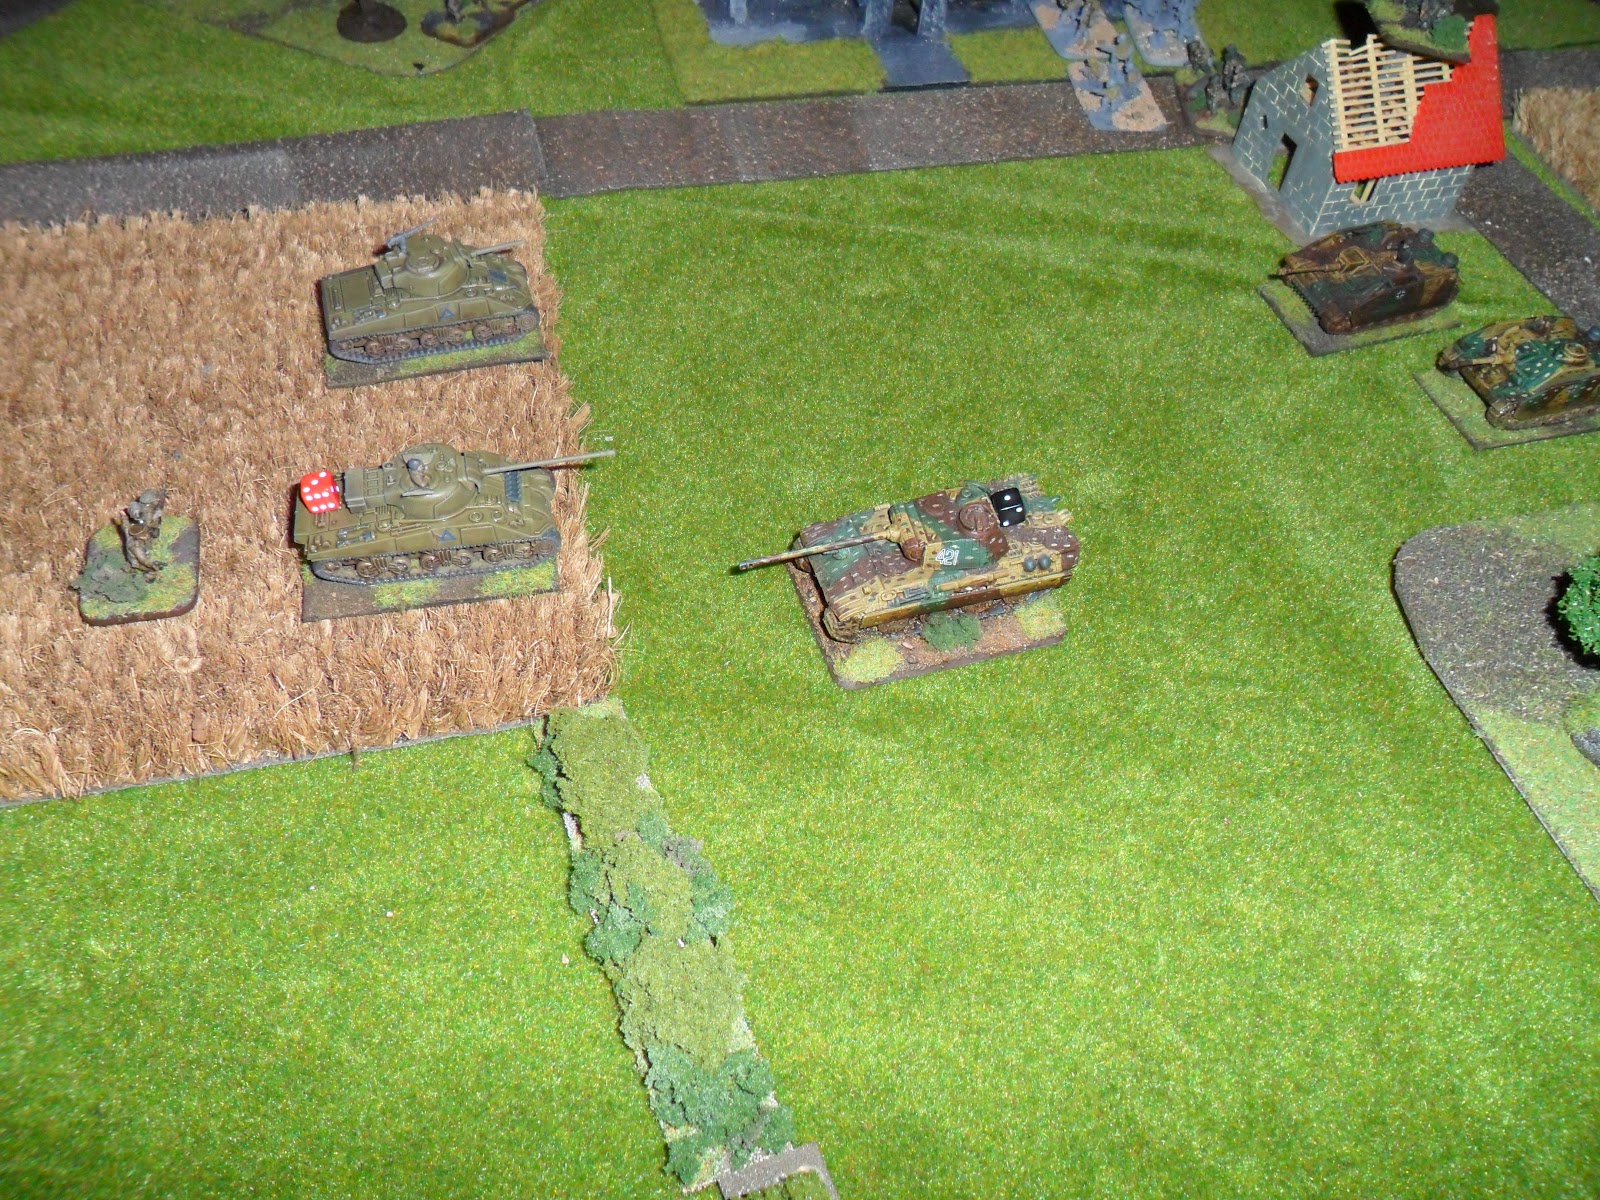
The Germans had an equally uneventful start. A German FAO located in the Church tower in Elst attempted to call in a Nebelwerfer barrage on the left flank of the Worcesters however the rocket fire proved inaccurate and landed off the table. The Panther moved out from behind the woods and opened fire on the Dragoon guards moving towards the town. 2 successful hits where scored but the leading Sherman unit remained unphased. An attempt to order a 2nd round of shooting failed, as did an attempt by the German CO to reissue the order.


The British situation at the end of Turn 1. SS troops await to engage the Worcesters on the left flank.


The 2nd British Turn saw more success. The Dragoon Guards squadron moved up towards the Panther and returned fire. 2 successful rounds of shooting from the squadron saw the Panther destroyed. This left the Germans in a very perilous position, with no anti tank capability left to defend that road until their reinforcements arrived.


The Somersets moved up towards the woods preparing to follow up on the success of the tanks. The Worcesters Managed to get another round of movement underway but their progress was still painfully slow compared to the Somersets.


The 2nd German turn saw them take some revenge. Another Nebelwerfer barrage failed, however the company of SS opened fire with devastating effect on the Worcesters. A 2nd order to open fire resulted in a double one, which meant a further 2 rounds of firing. Thankfully for the British the next order failed, however the battalion had lost 4 units.


German Heer troops in the woods near the town also managed to destroy a unit of the Somersets and suppress another.


The Aftermath of the SS cutting down the Worcesters. That was 6 stands of infantry beforehand!


Turns 3-4


The British 3rd turn saw them regaining control of the situation. First an FAO accompanying the Worcesters managed to call in a barrage from a 25pdr battery on top the SS with devastating accuracy. 2 units ended up suppressed with multiple hits scored on all. Then the Dragoon Guards moved up and opened fire on the SS with their machine guns. One of the suppressed units fell back into the other knocking it out. The other suppressed unit them fled 11cm and was removed. A second successful round of firing caused the 2 renaming units to be destroyed. 

Despite getting their revenge the British had suffered major casualties. Half the Worcesters where effectively destroyed in a single turn and the remaining stands of those two companies took no further significant part in the day’s events. The Somersets now moved further into the woods and where now almost at the outskirts of Elst


Thankfully German 3rd turn brought the arrival of one of their reinforcements, however it was only the Panzer III unit which came in at the top of the map. Nevertheless it was better than nothing and it eagerly took up position by the woods and opened fire on the lead Sherman unit of the Dragoons supporting the Worcesters. Sadly it only scored a single hit, but it was enough to suppress it, which may well buy the Germans precious time.


German infantry opened fire on the Somersets but thanks to being concealed by the woods only a coupe of hits where caused with a single suppression. The Germans had held a company of infantry back by the Church ready to commit wherever things looked bleak and now they moved these into the woods by the Church alongside the troops already there. This offered them a decent field of vision on the advancing British. Some more fire from Heer troops already in the woods scored a couple of meager hits on the Worcesters.


The German defenders at the end of their 3rd turn, hoping they can hold off until the Assault guns arrive.


The British 4th turn saw the remaining 2 tank units of the Dragoons open fire on the Panzer III unit which was destroyed utterly. Thankfully they failed to do anything else. The Worcesters moved up to the edge of the woods and a firefight erupted between them and Germans in the woods opposite. A single German stand was suppressed and few hits scored, the Germans returned opportunity fire but themselves only scored a few hits.


The Somersets again opened fire on the infantry in the town only scoring a couple of hits, the German response was equally dismal. The Shermans failed to do anything and not even the CO could force them to do otherwise.


The German turn 4 was got off to a dismal start when the FAO finally managing to call in another Nebelwerfer onto the Worcesters, however the this deviated right on top of the woods containing their own troops! Thankfully only one stand was covered but it suffered 4 hits. A bit of luck came when an order to open fire on the Somersets resulted in a double one. The 2 rounds of fire suppressed 2 units and scored hits on several others. The remaining German infantry opened fire on the Somersets and caused a few more hits.


Turn 5.

The British now managed to call in their 2nd 25pdr barrage of the game which came in bang on target on the Germans in the woods, hitting 6 stands. Every single one of the stands took at least 2 hits and one even took 5. The Worcesters now managed to get get off 2 successful rounds of firing which they carefully targeted onto the units with the most hits. The managed to remove 4 units of infantry, an absolutely devastating result for the Germans


The Somersets opened fire on the Germans in the town finally removing another stand whilst the Dragoon squadron accompanying the Somersets got its act together and raced towards the town. 2 rounds of shooting removed a further 2 stands of German infantry. The turn finished with the roll of a double 1 for the dragoons resulting a half move back towards their own lines. Not actually a bad result!

Thanks to this devastating turn the Germans where now 2 over their break-point. The Germans started their turn with a roll of a 10, meaning they pulled out and the fight was over.


The situation at the end of the game. Only a few stand of defenders left around the down. A rather overwhelming victory for the British in a battle they historically lost.


Aftermath


The main mistake for the Germans was to throw away the SS troops too quickly. I should probably have recognized the danger from the British Armour and pulled them back rather than sticking around for a 3rd round of firing. Even though they cause some major damage to the Worcesters they could have been a real game changer later on and sacrificing them was a mistake.

Getting the Panther knocked out early was also disastrous and left one flank with no anti Tank capability, sadly the failure of the Stug Brigade to arrive before the break point was reached put the Germans firmly on the defensive and allowed the Dragoon guards to shoot up the German infantry at the end of the game with impunity.

For the British, even though only 2 artillery strikes were called in, both where extremely important in terms of driving away the troublesome SS and tipping the balance in the firefight with the 1st and 2nd infantry companies in the woods near Elst. Whereas the German nerblewerfers suffered some extremely bad luck indeed. Rolling doule dice for deviation means hitting the exact point you want is unlikley.

Anyway this was a very fun, if rather short, game. My thanks to Bob MacKenzie for coming up with the scenario. I assume I don't have to tell you to visit his excellent site.


Monday 7 May 2012

Taking the Initiative.

This scenario is based on Charles Grant and Stuart Asquith's book Scenarios for all ages. I picked this up of a few days ago when I was in Birmingham and wandered into Waylands Forge. I remembered the book being mentioned by another poster on the Blitzkreig Commander forums so decided to hand over my cash.

On the Train back home I read through the book and was taken with one of the Scenarios called 'Taking the Initiative'. The object of the scenario is for one force to grab a foothold over 2 parallel rivers. The attacking force starts out small but with the element of surprise. The longer it takes carry out it's task the more difficult things will get. Hence the need to 'Take the initiative'.

Both sides have reinforcements coming in throughout the scenario. Though in what order they arrive is determined randomly.


I translated the 2 sides (Red and Blue in the book) into British and German forces. The British forces are attacking.

The British Come on from their entry point at the start of the game, with reinforcements coming in later.

The Germans have a very small force at point A, a Slightly larger one at point B, with the rest of the force coming on as reinforcements throughout the game.

German Forces:

At point A

1 x Infantry (heer)
1 x Infantry with Panzershrek upgrade.
1 x HQ (CV8)

At Point B
2 x Infantry (heer)
1 x MG42
1 x Panzer IV
1 x CO (CV9)

Reinforcements

Group A:
3 x Infantry (heer)
1 x MG42
1 x HQ (CV8)
4 x Transport Trucks

Group B:
3 x Infantry (heer)
1 x MG42
1 x HQ (CV8)
1 x Pak40
5 x Transport Trucks

Group C
2 x Jagdpanzer
1 x HQ (CV8)

British Forces:

Initial force. Enters on Turn 1.
2 x Infantry (Regulars)
2 x Sherman 75mm
1 x Firefly
1 x HQ (CV8)

Reinforcements

Group A
3 x Infantry (Regulars)
1 x 3” mortar
1 x Sherman 75mm
1 x HQ (CV8)

Group B
3 x Infantry (Regulars)
1 x HMG
1 x Honey
1 x CO (CV9)

Group C
3 x Infantry (Regulars)
1 x HMG
1 x Sherman 75mm
1 x Firefly
1 x HQ (CV8)

Group D
3 x Infantry (Regulars)
3” mortar
1 x 6Pdr

The British receive reinforcements on turns 2, 4, 6 and 8. The Germans on turns 4, 6 and 9. Which group arrives is random. The book suggest the use of cards, though I just rolled a dice.


Turns 1-3

Things get off to a disastrous start for the British with them failing the first command roll of the game, so the initial force simply sat at the edge of the table. Obviously their commander was nervous.

The Germans meanwhile have no such problems and whilst the force at point A remains where it is, the 2nd force at point B moves up the road to reinforce them.

The British fair little better as the first group of reinforcements arrive and proceed to trundle up the road towards the bridge but do so cautiously, the first group however still remains where it started whilst their commander checks his map.


Meanwhile the German Armour start to move into position around the village. The British it seems have totally failed to get the drop on the tiny force guarding the first bridge.

Turn 3 Brings a bit more luck for the British who actually manage to bring their forces up towards the Bridge, unfortunately the Germans are in a much stronger position now.

The Germans now steamroller forwards with the help of a double 1. The Panzer 4 unit now just outside the village opens fire on the approaching Firefly unit and successfully suppresses it.


Turns 4-7

Reinforcements arrive for both sides, with the British receiving more infantry and armour and Germans gaining a company of infantry in in trucks and a Pak 40 anti tank gun unit.

The arrival of new forces does little for the British morale and they continue to only edge slightly towards the bridge. Some German opportunity fire from the village suppresses one infantry platoon and the British Shermans manage to suppress the Panzer IV unit, but otherwise things are uneventful.

The German reinforcements race towards village, however a command blunder then sends them half a move back up the road! Obviously some conflicting orders where received over the radio. Some ineffective fire from the village was the only other thing the Germans could muster.

 Finally the British get some full steam behind their attack and manage to move some infantry up to the river bank to cover the armour who now have reached the end of the bridge. British armour concentrates on the Panzer IV unit and finally destroys it. British Infantry also mange to destroy the German MG42. Attempts to drive out or suppress the German infantry in the buildings however prove fruitless.

The Germans have a slightly better time of things finally managing to get the trucks up to the side of village, but then failing to disembark.


A relatively ineffective turn for the British follows with orders to storm the bridge being ignored or second guessed. Suppressing an infantry unit on the far side of the river is about the best they can achieve.

The German reinforcements now move into position and disembark. The places a PAK40 with a dangerously effective view of the flank of the British tanks. Thankfully they don't manage to get any shots off. The Germany units in the village get manage to open fire on the approaching British infantry, but then another command blunder forces them to retreat from their cover. To make matters worse 2 Jagdpanzer units now arrive for the Germans and head towards the front lines.
The British take this opportunity to force their Armour across the bridge, but poor command rolls leave them spread across the bridge just waiting for German retaliation.

The German response is downright deadly. Firstly the Jagdpanzers race towards the village and catch a glimpse of the leading British Sherman tank unit. They destroy the unit almost effortlessly. Then then duck out of sight and place themselves in position to snipe any British tanks that dare poke their noses out from the Village.

Then Pak40 unit then fires on the flank of one of the Sherman units on the bridge, successfully suppressing it. This creates a nasty bottleneck on the bridge. The newly arrived German infantry pours fire onto the British infantry on the other side of the river and the British casualties begin to mount.
Turns 8-10

The solitary British Tank unit in front of the suppressed tank moves behind the building out of the way of the action. The remaining British armour, now unable to progress until the unit of the bridge gets its act together, decide the deal with the threat of the Pak40. Concentrated machine gun fire does the job nicely, but the German Anti Tank unit has done it's job, putting a halt to British attempts to gain a foothold across the bridge.

British infantry moves up to the river and opens fire of the Germans on the other side but it's largely ineffective.

Finally the last of the British reinforcements arrive along with the British CO, but its unlikely to make a difference at this late stage.

The German infantry on the far side of the river pour fire onto the British and destroy further 2 platoons. The tank hunters bide their time.

Finally unsuppressed the British armour pours across the bridge and over to the far side of the village. Hoping they can destroy (or at least suppress) the German Jagdpanzers. What followed was disaster, yet another command blunder causes 4 hits on the Sherman Firefly, who promptly fails all 4 saving throws and gets destroyed. British infantry pushes onto the Bridge.


The last of the German reinforcements arrive. However a poor command roll means they remain at the starting line. The Jadgpanthers suppress the remaining Firefly but fail to do anything else. The Germany infantry pour murderous fire onto the British infantry on the Bridge who are now just one away from reaching their breakpoint.

The last turn for the British is ineffective with 2 failed command rolls leaving the British Armour on the far side of the Bridge unable to do anything. The Honey tank races over the Bridge but can make no difference to the outcome. The British crossing the bridge also remain where they are.

Thankfully the last German turn is just an uneventful. The Jagdpanzers failing a command roll and the Truck mounted infantry remaining stationary for the 2nd consecutive turn. Fire from the infantry causes a suppression but nothing else.
Aftermath.

Well according the conditions in the scenario, in order to gain a victory the attacking force must have a foothold over both rivers. With the outcome being a draw in they have a foothold over one but not the other. Even though the British are in possession of the first Bridge, the German presence around the village is still significant and as a result I think its fair to declare the game a minor German victory.

Unfortunately the British, thanks to some appalling rolls in the first couple of turns, totally failed to 'Take the Initiative' and grab the bridge early. This allowed the Germans to successfully reinforce the tiny garrison and hold them off for much of the game.

Had the British acted decisively early on and the Germans been forced to split their defence between the 2 bridges on the far river then things might have gone differently. fortunately for them the British fell at the first hurdle.

Sunday 8 April 2012

Counter attack in Normandy.

Counter attack in Normandy.

It's Easter Sunday, so what better way to spend the afternoon than with a quick solo game of BCK!

A British Battalion with armour support attempts to hold the fictional French town of Sainte Claire from counter attack by a German SS Kampfgruppe. The scenario is counter attack from the Blitzkrieg Commander rulebook.

OOB is as follows:

British

CO - CV9
HQ - CV 8
5 x Infantry (Regulars)
2 x Infantry (Regulars) w Piat
1 x Vickers MG
1 x 6 Pdr Anti Tank
1 x Honey (Recce)
1 x Sherman 75mm
1 x Sherman Firefly

German

CO - CV9
HQ - CV 8
5 x Infantry (Heer)
1 x Infantry (Heer) w Panzerschreck
2 x MG42
4 x Infantry (Waffen SS)
3 x STUG III
1 x Panther


An overview of the table. The British deploy in the 1/3rd of the table at the bottom of the picture with the Germans coming on from the far edge in the first turn.


Deployed. The British deploy trying to cover the likely approaches for the Germans. The British Infantry in and around the main town itself and near the woods to the west, whilst their armour deploys to the east.

Turn 1

The Germans get off to a rip roaring start with their armour coming on to the east of the main road. They approach the edge of the cornfield gingerly probing for the British and then await further instructions. Meanwhile the Heer moves up towards the woods west of the road whilst the SS moves up in support of the Panzers.


The British tank commander hears the roar of German engines and enthusiastically orders his tanks forward for a better view. In the meantime the Honey zooms up to the woods in the hope of getting a look at the German advance.

At the edge of the Cornfield the British tank HQ spots the approaching Stugs (the Panther being safely out of sight behind the woods) and orders his tanks to open fire. The volume of fire however is disappointing causing only a single hit on one of the approaching assault guns.

In the meantime several Platoons of British infantry advance in the the woods west of the town and take up positions at the edge to await jerry! 


Turn 2

The German Panzer HQ is clearly spooked by the incoming fire from the British armour and promptly fails to order his armour to do anything whilst he reassesses the situation. The german Heer however continue their advance to the west of the town and the SS push past their confused comrades in the Panzers and head towards the church. The British tanks, spotting the SS, open fire with their MG's, but only score a single hit. The SS shrug this off and push further up the road.


The British Honey unit attempts to radio HQ with information but thanks to some gremlins in the machinery HQ fails to get the message. Not that this matters to the tank commander who mange to get off 2 successful founds of firing, knocking out one of the Stugs units. First blood to the British!

The Vickers gun in the town opens fire on the SS and successfully suppresses a platoon.


Turn 3.

German armour moves up into a a better firing position and engages the British, a successful round of firing manages to suppress the Firefly unit, but the commanders attempt to keep up the pressure results in disaster as the Panzer units ignore their orders to systemically destroy the British tanks and instead charge out towards them. The German armour is suddenly dangerously exposed!


The infantry fares a little better advancing towards the town. The Heer units round the back of the church are opportunistically engaged by British infantry in the woods who manage to suppress one of the infantry platoons, the German attempt to return fire manages in turn suppress one of the British Platoons. The SS on the road to the front of the church manages to suppress another one of the British platoons in the woods.


The unsuppressed British Sherman platoon uses its initiative to open fire at the Panther unit in the hope of suppressing it. This will probably be the only way of saving their own bacon. Despite scoring a hit the Panther unit fails to be intimidated by the puny fire of the 75mm guns.

The British Tank HQ, instead of calmly ordering his men to keep firing, enters a bind state of panic and blunders! His ability to command is severely comprised unit the end of the next turn. Needless to say his attempt to order his tanks any further fails.


The infantry in the woods open fire and promptly wipe out a Heer platoon and the 6pdr by the crossroads manages to suppress one of the remaining Stug units. Further attempts to open fire however are unsuccessful.


Turn 4.

The German armour now have the British tanks at their mercy and needless to say they don’t show any! The Panther and unsuppressed Stugg units destroy the Firefly and the Sherman 75mm units with 2 rounds of deadly fire. Both units them move up towards the edge of the town. A British infantry Platoon in one of the buildings attempts to attack the Panther with opportunity fire from a PIAT but scores only a single hit.


The German infantry pours fire into the British in the woods. The Heer managing to drive an already suppressed unit back a whopping 18cm, which needless to say destroys it, whilst moving 2 of their own platoons up to try and flank the woods. The SS efforts are even more sucessful, destroying one platoon and driving another back into the middle of the woods.

With 4 units gone, a breakpoint of only 6 and the right flank gone things look very bad for the British!


The British turn however sees a staggeringly rugged display of tenacity as they attempt to salvage what they can can from their situation. The CO in the woods managing to successfully order the British infantry in and around the woods to open fire no less than 4 times!

The result of this heroic action is the destruction of 2 Heer units by the infantry in the woods and a further Platoon being destroyed and another being driven back by a British platoon located in a building behind the woods, which quickly halts any German ideas about flanking the British position. the vickers MG manages to suppress (but not quite destroy) a unit of the SS on the road and the 6pdr drives one of the Stugs back to the edge of the cornfield.

The Germans are now only 2 away from their own break point!

Turn 5

The Panther unit opens fire on the infantry platoon that attempted to ambush it last turn, however it fails to score a single hit. In the Meantime the unsuppressed Stug moves up to to it's side. The British platoon again attempts to fire with the PIAT using opportunity fire but fails to hit the Stug. The Panther and Stug units now open fire on the 6pdr platoon, which has it's flank exposed to them. Needless to say it's swiftly destroyed.


The German infantry now has its own moment of glory with 3 successful command rolls. The Heer open fires on the remaining British Platoons in the woods and manages The wipe out 2 of them. In the Meantime the 3 unsuppressed SS units move into the the woods and destroy the platoon they managed to successfully drive back earlier.


The British have now lost 7 platoons and proceed to fail their check at the start of their turn. With only a handful of men and no armour remaining they withdraw to lick their wounds.